Week 3: Level navigation, winning/losing game states
In Gamefroot, game states are like chapters in a book. Players work their way through one, and when finished, move on to the next i.e. Game Loader, Start Screen, Game Over, Game Win.
This week you’re going to add states to your game. You will create a new script and apply it to objects designed to trigger these states. In addition, you will learn how to navigate between levels.
Programming concepts we'll learn:
- Conditional logic
- If-statements
- Mouse input event
1: Adding levels for win/lose states
- Add new level
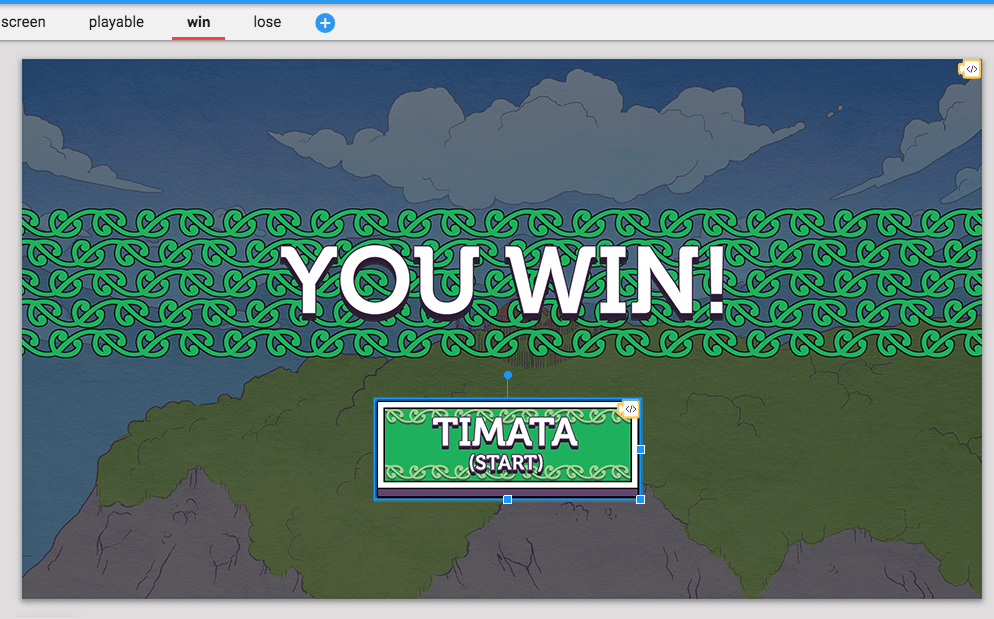
- Rename to “You Win”
- Place objects to make it look like a win screen
- Add lose screen level
- Rename to “You Lose”
- Place objects to make it look like a lose screen
- In the next step we’ll add a trophy object that will win the game
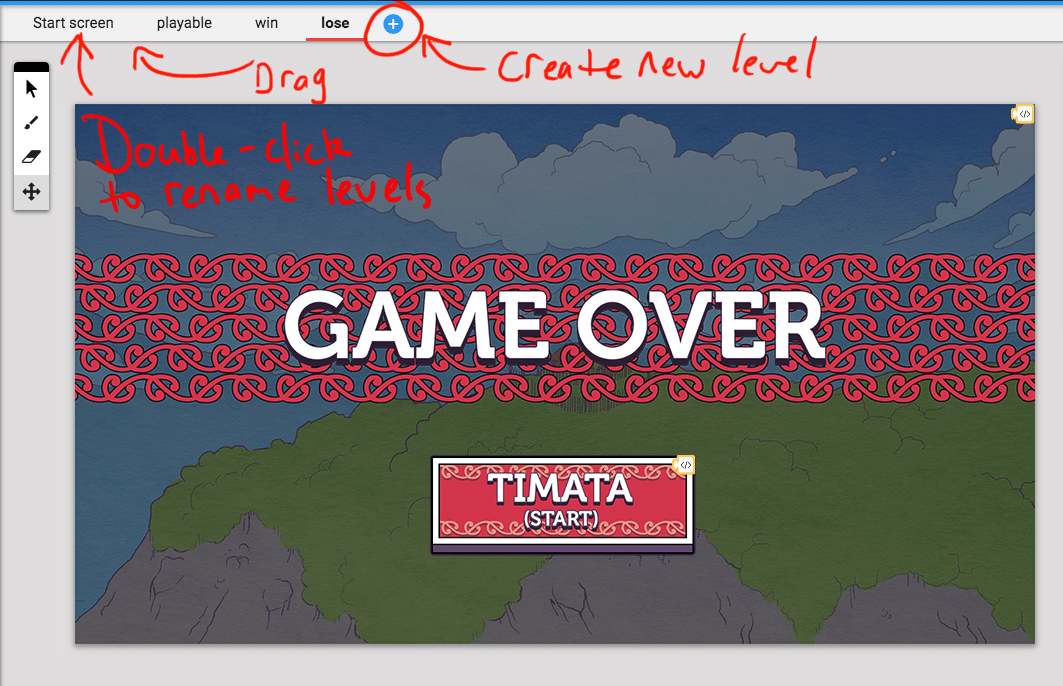
We’ll begin by adding add a new level to your game for each state that you want to include. Start by adding a “You win” level and a “You lose” level. Watch the video below to learn how to add new levels.
2: Adding a trophy object
- Switch back to playable level
- Place object in playable level to send you to win screen
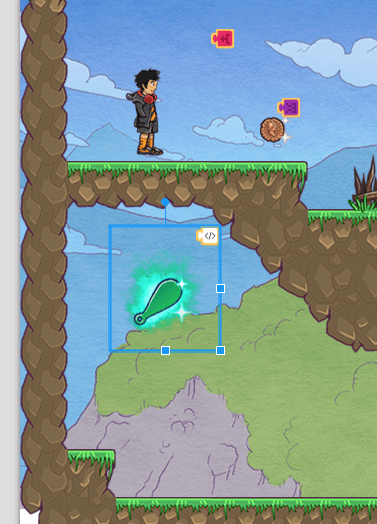
- Add script to this object
- When created from events
- Add tag tag name on myself from sensing
- Change tag to “you win”

- In the next step we’ll get the player to detect the collision with this object
Now we’ll add an object that will send the player to the “You win” level. Watch the video below for a refresher on adding objects with name tags.
3: Detecting collision with the trophy
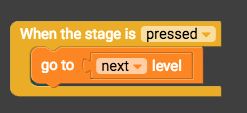
- Edit player script
- Add another “if do” block (from control flow) to collision detection
- “Myself has tag tag name” from sensing, change tag to “you win”
- “Go to next level” from control flow
- Replace “next level” with “0” from operators
- Change 0 to correct number for level, first level is 0, second level is 1, third level is 2, etc.
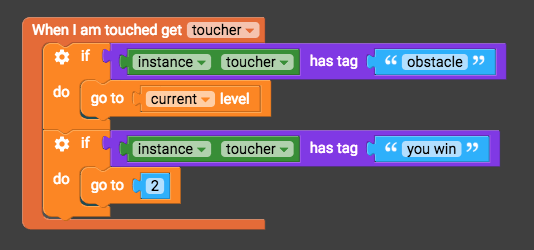

- Play to test it
- In the next step we’ll change the obstacle detection to send you to the “You lose!” screen
Next we’ll make the player detect when it collides with the trophy. Watch the video below for a refresher on collision detecti
4: Changing the obstacle collision
- Collision detection for lose
- Edit player script
- Change obstacle collision detection to go to level number instead of current
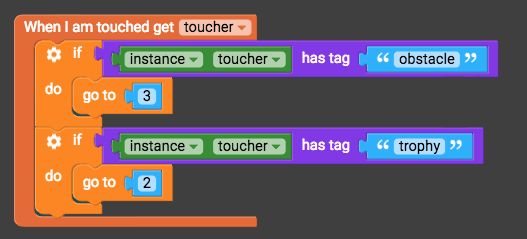
- Play to test
- In the next step we’ll program a replay button
Now we’ll change the obstacle collision detection to send you to the “You Lose!” screen. Watch the video below for a refresher on collision detection.
5: Programming a replay button
- Make sure win and lose screen both have a Replay? Button
- Add script to replay button
- “When the player presses myself” from events
- “Go to next level” from control flow
- Change next to first
- Close script editor and save script
- Add this script to the other screen’s replay button
- Play game to test
- In the next step we’ll add a start screen
In this step we’ll add in a Replay button. Watch the video below to see how to create a button for level navigation.
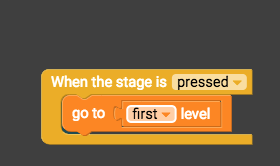
6: Adding a start screen
- Add a new level
- Rename to start screen
- Drag level to the front
- Place objects in level so that it looks like a start screen with “click to start” button

- Right-click add script
- “When stage is pressed” from events
- “Go to next level” from control flow
- Play game to test
- Next week we’ll add a score system to the game using variables
In this step we’ll add in a start screen. Watch the video below to see how to create a start screen to your game.