Week 1: Getting Started & Player Animations
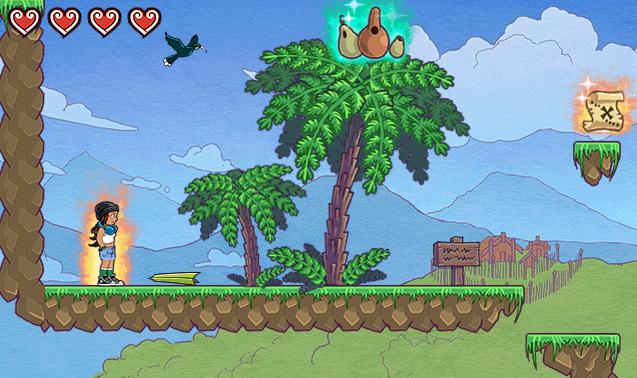
These tutorials are for expanding upon the basic platformer game. They cover improved camera controls, improved player controls, improvements to shooting different kinds of projectiles, improved obstacles and enemies, story dialog, player animations and effects, and the ability to slide down walls and then jump off them.
Step 1: Getting Started
You'll find that these tutorials work best with the "Nga Takaro" asset pack from the Marketplace. If your original platformer game was built using a different asset pack, you’ll probably have an easier time building a new game that uses the scripts you’ve created in your original platformer game.
- Make a new game
- Grab the Nga Takaro asset pack from the Marketplace
You can follow the tutorial for the original Platformer game if you need to remember some of the basics of laying out your level.
Once you get to programming your game objects, you can save time by copying over your old scripts into your new game by Exporting and Importing them from the Script editor.
- In another tab in your web browser, open your original platformer game
- Open the Player controls script
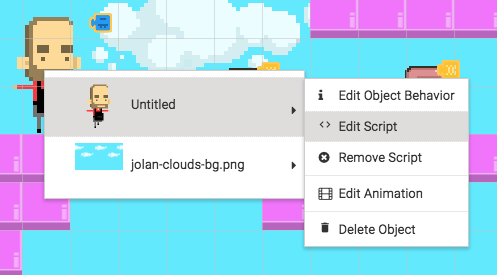
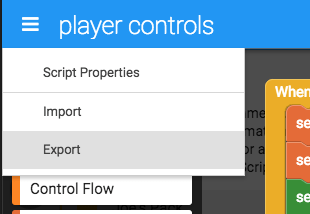
- Click the Script menu button (top-left), and select Export
- Right-click on the code, and click “select all”
- Then right-click on the code again and select “copy”

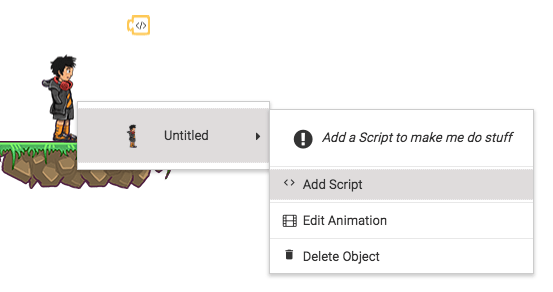
- Now back in your new game in your first tab, add a new script to your player
- Open the script menu (in the top-left) and select Import
- Paste the code in here by right-clicking and choosing Paste
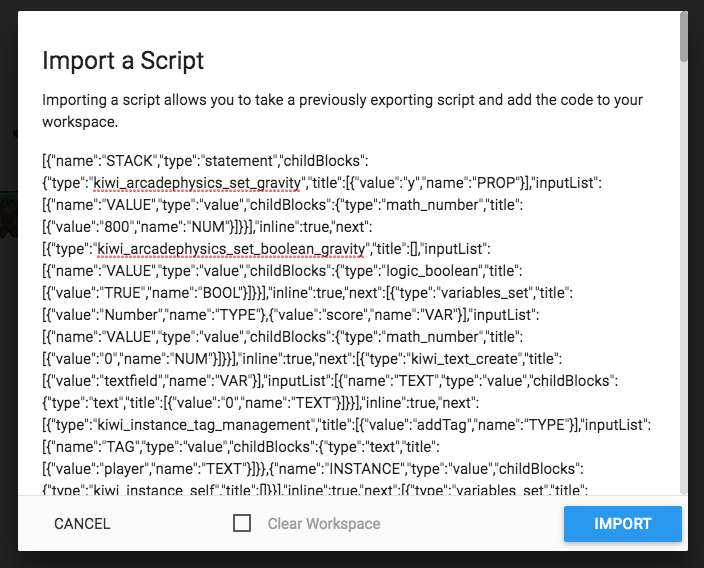
- Then click import.
Spend some time building out your new game and importing all the old scripts. Move on to the next part of this tutorial once you’re ready to start adding new game mechanics.
Step 2: Improved Player Animations Part 1
If you aren’t already telling the player character to play animations, then your player is probably just frozen in one pose while they move around. This doesn’t look good!
The boy and girl characters have animations for running, jumping, falling, standing still, and dying. These are named “run”, “jump”, “fall”, “idle”, and “dying”.
- Before we start, please make sure you get rid of your existing animation blocks, or else they will interfere with what we are about to do.
We will create a new function that can figure out what animation should be playing, and then play that animation. This function will run inside out constantly loop.
- Find the constantly loop in your player script, and add a new function named “play correct animations”
- Do something (functions)
- Rename the function to “play correct animations”

Now run this function in the constantly loop. You might have an existing constantly loop that looks like the one below with a bunch of extra blocks. It doesn’t matter too much, just make sure “play correct animations” is at the bottom.
- “Play correct animations” (functions)
- Drag it into constantly block

Now we will make this function check all the conditions for correct animations.
Step 3: Improved Player Animations Part 2
Dying animation
First, is the player alive or dead? If you don’t already have a variable keeping track of this, add one now, and set it to true when the level starts.
- Find when the level starts in your script
- Add “set true/false alive? To true” (variables)

Now we know the player is alive when the level starts. Back in our “play correct animations” function, we want to check if the player is alive, else if they aren’t, play the dying animation.
Add this to the “play correct animations” function:
- If true/false alive, else play animation dying
- If do (control flow)
- true/false alive? (variables)
- Change if to if else
- Play animation dying (animation)

- Test the game to see if the player plays the dying animation when they should die.
If your player doesn’t have time to play the dying animation, it’s probably because you are making the player “die” by restarting the level. Let’s go and change that.
- Find all the places where you are making your player die by restarting the level, and replace those with a new function called “die”
- To do something (functions), name this “die”
- Replace all “go to current level” blocks with “die” (functions)

- And here:

- And here:

- And here:

- (And anywhere else you are restarting the level.)
Now the “die” function. It should set “true/false alive” to false so that our “play correct animations” functions can check for that.
- Inside the “die” function:
- Set true/false alive to false (variables)

- Test your game now to see if the dying animation plays when you should die.
It does, but the animation keeps looping, and you can still run around when dead.
Step 4: Improved Player Animations Part 3
When the player dies, disable physics so they can’t move. When the dying animation loops, make the player go invisible.
- In the “die” function:
- Set physics enabled false (physics)

- When the animation name has completed (animations)
- Change animation name to “dying”
- Change “completed” to “looped”
- Set visibility of myself to false (looks)

- Test it out to see player die nicely.
Now make the game restart a few seconds after the player dies. Add to the “die” function:
- In 3000 milliseconds, go to first level
- 100 milliseconds (control flow)
- Go to first level (control flow)

- Test it now to see the player die and the game restart.
Now onto the rest of the animation.
Step 5: Improved Player Animations Part 4
Scaling the player left or right
To keep all animation related commands in one area, let’s remove “set scale x” from “when key pressed” blocks, and put them in our animation function instead.
- Remove “set scale x” blocks from “when right arrow pressed” and “when left arrow pressed”

In the “play correct animations” function, when checking if “alive”, also check if left arrow is pressed, and if it is, set scale x of myself to -1, else check if right arrow is pressed, and if it is, set scale x of myself to 1.
- If do (control flow)
- Key left arrow pressed? (events)
- Set scale x of myself to -1 (transform)
- Change if to if-else-if
- Key right arrow pressed? (events)
- Set scale x of myself to 1 (transform)

- Nice. Test it to make sure it works. Now onto jumping and falling.
Jumping and falling
After checking if left or right arrow keys are pressed, we’ll check if the player should be jumping or falling.
If the player is moving upwards, their y velocity will be negative, so make them play the jump animation, but if the player is moving downwards, their y velocity will be positive, so make them play the fall animation
If velocity y < 0, play animation jump, else if velocity y > 0, play animation fall, else…
- If do (control flow)
- Velocity y (physics)
- < (operators)
- 0 (operators)
- Play animation name (animation)

- Change if to if-else-if-else

- Duplicate the “velocity y < 0” and “play animation jump” and put them in the else if block.
- Change < to >, and change “jump” to “fall”

- Test it out now to see the jumping and falling animations play.
Step 6: Improved Player Animations Part 5
Running and idle
If the player is alive, if they aren’t jumping or falling, then they are either standing still (idle) or running.
If velocity x = 0, play idle animation, else play run animation
- If (control flow)
- Change if to if-else
- Velocity x (physics)
- = (operators)
- Play animation name (animations)
- Change name to idle
- Play animation name (animations)
- Change name to run

- Test it out to see all the animations playing nicely!
⚡ Bonus Activities ⚡
Falling too far
If the player falls too far we can make the game end. We will test how fast the player falls, and then if they reach a certain speed we can make the level restart.
- Edit the player controls script
- Constantly log velocity y
- Find constantly block, add Log block (from Control Flow)
- Add velocity y (from physics) to log block

- Play game to test, click bug icon in bottom left to see the log results. How fast was the player falling when you want to end the game?
- Now we will end the game if they fell too fast
- Constantly, if velocity y > 2000, go to current level
- If do (control flow)
- Velocity y (physics)
- Greater than (operators)
- Number (operators)
- Go to current level (control flow)
- Change the number to whatever the falling velocity limit should be

- Test the game to make sure the velocity is good.